Each year, British Science Week celebrates all things science along with technology, engineering and maths. This year, the annual event will take place from the 5th-14th March with the theme ‘Innovating for the future’.
Science is all about innovation and working to create a better future for all, so whether your children are at home or at school, it’s important to get them involved.
If your kids are at home why not treat it like a game and get their thinking caps on by asking them which machine they would like to invent and why. Ask them to jot their ideas down, whether that’s using words, drawings or even making something. Next, ask them exactly what it is they want their invention to do and how it will do this, as this will get them talking about the science, technology, engineering and maths behind their idea. And who knows, they may have just come up with the next big scientific breakthrough!
If their invention is a bit out there and you don’t have the materials for them to create it, we’ve picked some of our favourite alternative experiments from the Science Museum website for them to try, which are equally just as fun and easy to do!
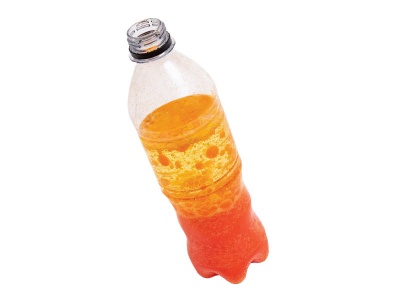
Learn about density by making your own Lava Lamp
Materials:
A clean plastic bottle, try to use one with smooth sides
Water
Vegetable oil
Fizzy vitamin tablet
Food colouring
Instructions:
- Use the funnel to pour water into a clean bottle until it is one-third full. Add a few drops of red food colouring.
- Fill the rest of the bottle with vegetable oil.
- Break the vitamin tablet in half and add it to the bottle. Watch the lava bubbles!
How it works:
This lava lamp effect works for two reasons. The first is that oil and water don’t mix. This is because water molecules are attracted to each other but not to oil. The other reason is because of density, which is how compact a substance is. Water is denser than oil, so the oil layer stays on top. The vitamin tablet falls through the oil, and when it reacts with the water it produces bubbles of carbon dioxide gas. This gas floats to the surface because it is less dense than both the water and the oil, carrying some coloured water with it. When the bubbles pop, the gas is released, and the denser water sinks back down again.

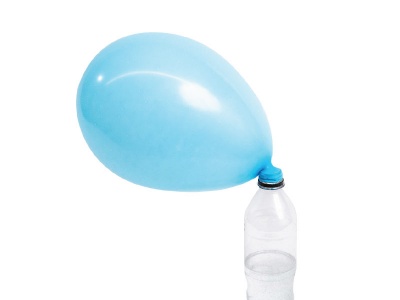
Create carbon dioxide with this Blow-Up Balloon experiment
Materials:
Small plastic bottle
Baking soda
Balloon
Funnel or piece of paper
Teaspoon
Vinegar
Instructions:
- Half fill the bottle with vinegar.
- Using a funnel, half fill the balloon with baking soda. It helps if you’ve pre-stretched the balloon by blowing it up. You can make a funnel by rolling up a piece of paper.
- Carefully place the balloon over the neck of the bottle and allow it to droop over to the side, making sure none of the baking soda falls into the bottle.
- Lift the end of the balloon and pour the baking soda into the bottle. Shake well and place the bottle on a table. Watch the balloon inflate all by itself!
How it works:
When you add the baking soda to the vinegar it causes a reaction. That reaction releases a gas called carbon dioxide (CO2 ). Because the balloon forms a seal around the bottle, the gas produced cannot escape, so it fills up the balloon.

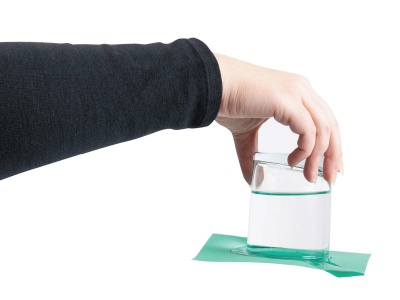
Teach your children about forces with this Gravity-Defying Water experiment
Materials:
Plastic tray
Water
A glass
Thick card
Instructions:
- Fill the glass with water.
- Place the card on top.
- Turn the glass over, while holding onto the card and making sure the card always stays flat. Do this over the plastic tray.
- When the glass is upside down let go of the card… and it should stay where it is!
How it works:
The weight of the water inside the glass presses down on the card, but there is another force pressing upwards on the card from outside: atmospheric pressure. The atmosphere is more than 100 kilometres thick, and the weight of all that air above means that, at ground level, the air pushes on everything, in all directions. The atmospheric pressure on the underside of the card is strong enough to counteract the pressure of the water pushing downwards – until the card becomes sodden and soft, and the water begins to leak out around the rim of the glass.

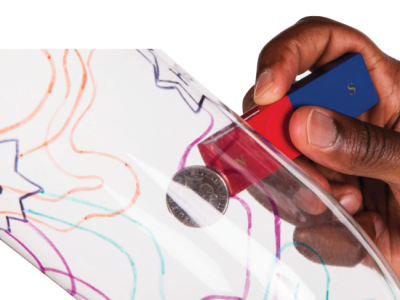
Here is a very simple experiment you can try which teaches about magnetism; Magnetic Maze
Materials:
A plastic bottle
A 10p and 20p coin or a ball bearing
A magnet
A marker pen
Instructions:
- Draw a maze onto the bottle with a marker pen.
- Drop the coin or ball bearing inside the bottle and use a magnet to guide it through the maze.
- Try doing the same with your other objects. Which ones work, and why?
- Try some different maze patterns too.
How it works:
A magnet is anything that has a magnetic field around it. In this activity, the magnet’s field temporarily makes the coin into another magnet. The two magnets attract, and the coin is pulled towards the magnet. Only certain materials are affected by magnetic fields in this way; by far the most affected is iron. Many modern coins are made of steel (an alloy made mostly of iron) coated with a thin layer of either copper or nickel. Twenty pence coins are made of an alloy of copper and nickel, and will not work in this activity.

To find out more including how to get involved with British Science Week visit their website and download their activity packs here.
We would love to see what you get up to during British Science Week, share your experiments with us on social media and don’t forget to tag us in! Facebook | Twitter